Dark Chocolate Almond Biscuits

Hands up if you love biscuits. I do.

I am always on the search for the perfect chocolate chip cookie; immediately drawn to anything containing browned butter or recipes that promise the perfect texture, crunch or chewiness. One-bowl preferable, resting the dough is a bonus – although it tests my patience I have learnt that this improves the end result infinitely – but even if the original recipe skips this steps I tend to test it.

dark chocolate almond shortbread unbaked

This recipe is inspired by one I found at Hemsley and Hemsley. It looked promising. Containing nut butter, maple syrup and with tales of a shortbread-like texture, but with added crunch and flavour from the nut butter and almond flour.

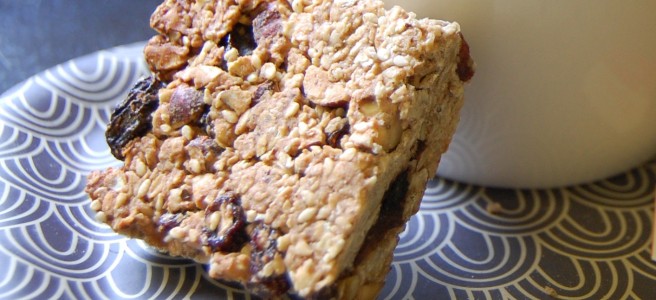
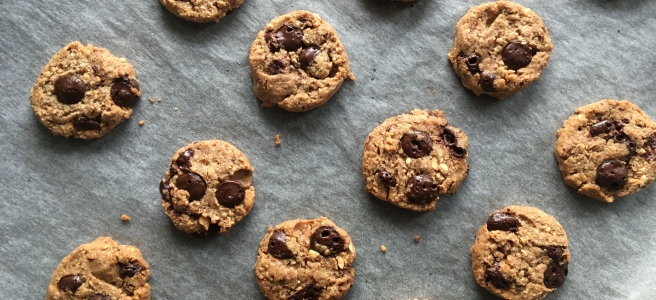
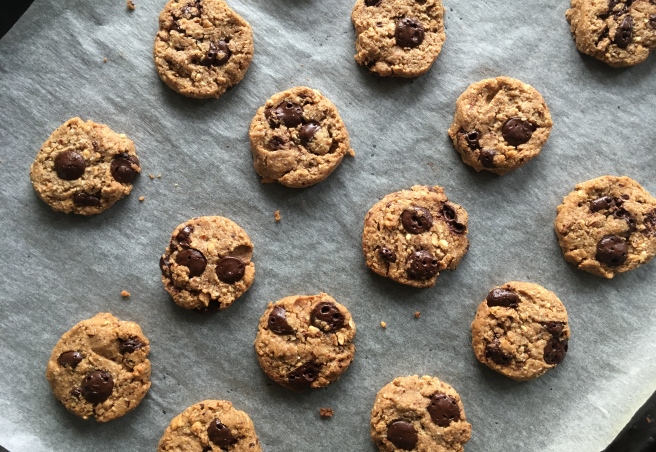
So I swapped in what I had on hand, and this is the result. A delicate, crisp and rich cookie that manages to be light but packed full of texture and taste. Try it.

IMG_5549

You will need:

  • 1 tbsp coconut oil, room temperature
  • 8 tbsp chunky almond butter (roasted and salted is my favourite and what I use)
  • 2 tbsp pure maple syrup
  • 1/3 tsp bicarbonate of soda
  • 1/3 tsp sea salt
  • 1/4 tsp ground cinnamon
  • 1 tsp vanilla paste
  • 80g ground almonds
  • 20g rice flour
  • 50g dark chocolate chips
  • 2-3 tbsp milk of choice

How to:

In a bowl, use a fork and mash together the coconut oil, almond butter and maple syrup. Add the dry ingredients and mix until it forms a ball that holds together. Mine was a bit crumbly so I added 3 tbsp nut milk – you may not need this much.

Take a sheet of clingfilm and place the dough on this. Shape into a log approx 3cm diameter, then roll up tightly until completely covered in clingfilm.

Put in fridge for at least 1 hour or overnight – I find this gives better texture and flavour.

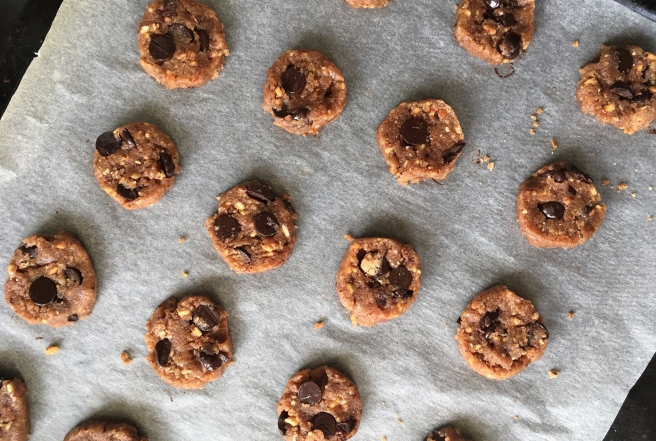
When ready to bake, preheat the oven to 160 degrees fan and line a baking tray with parchment paper. Unroll your log onto a chopping board, then with a sharp knife slice discs roughly 7mm height and place on baking tray. Continue until you have used all the dough – or have as many cookies as you want (the rest of the dough can be wrapped in clingfilm and kept in the freezer for 3-4 weeks).


Bake for approx 12 minutes until edges just start going golden. Let cool before eating.

Cardamom Marzipan Twists

marzipan and spelt buns

I have two go-to bun recipes – this is the easiest of the two. Adapted and scaled from my favourite Norwegian bakery – Godt Brød (lit. Good Bread), this is easy to put together and is a nice and small recipe – perfect for when you don’t want to fill the freezer.

The dough can easily be made vegan by replacing the butter with a neutral oil.

Bun Dough:

10g oats
100 ml water

80g light brown sugar
85g salted butter
250ml water – lukewarm
25g fresh yeast
10g freshly podded and ground cardamom (if you are feeling lazy you can use the ready ground stuff, but I recommend trying the fresh – it makes such a difference!)
5g salt
450g white spelt flour (or 500g wheat flour)

Place the oats in a wide bowl. Boil the kettle and pour 100 ml water over. Leave to cool. In another bowl, dissolve the fresh yeast in 250ml lukewarm water. Measure and cube the butter – leave on the side for now.

In a big baking bowl, stir together sugar, most of the flour, cardamom and salt. Make a well in the middle and pour in the yeast and water mixture and the cooled oats and water. With a spoon or just your hands, mix until a dough has formed. Add the butter and knead this in. Knead until you have a smooth dough that does not stick.

Cover the bowl with clingfilm and leave until doubled in size. Either on the kitchen top for 1-2 hours or overnight in the fridge which is what I like doing.

When ready to bake, make the filling.

Almond filling:

50g butter
100g ground almonds
100g sugar
1 tsp vanilla paste or extract
2 tsp cinnamon
1 tbsp water

Melt the butter, then add the other ingredients.  Stir well until you have a uniform paste.

Assemble:

On a well floured surface, lightly knead your dough, then pat and roll out to a rectangle with a rolling pin. Aim for about 1cm thickness – try to get it as even as possible. Turn the rectangle so you have the shorter side towards you. With a spoon or spatula, spread the filling over half the dough  Make sure to go all the way to the edge.

Fold the other part of the dough over, then go over with a rolling pin again to even it out and make sure the two sides sit together.

With your sharpest knife, cut down the middle, then down the middle of each half again. Repeat until you have 16 equal lengths. Twist each by holding one end flat and rolling the other up with your hand (try youtube for an instruction video if it is tricky!). Lift it up, and make into a knot.

I do it like this:
Hold the dough vertically between your hands. With your top hand, swirl the dough around itself, then tuck the last bit underneath. Place in little paper cases on a baking tray.

Cover the tray with a tea towel and leave to rise again – 30-40 minutes. Preheat the oven to 180 degrees fan. When the bun have grown a little, bake for 15-20 minutes or until a golden brown. Remove from oven and immediately brush all over with the vanilla syrup below. Drizzle over pearl sugar to finish. Remove from baking tray and let cool on a rack. Best the same day – if eaten the next day refresh them in the microwave for 15 secs or in a medium oven for 5 mins. They freeze very well, too.

Vanilla Syrup Glaze

100 ml water
100 ml caster sugar
1/2 tsp vanilla paste

Place all the ingredients in a pot, bring to a boil and let simmer for 5 minutes. Remove from the heat and let cool.


Guaranteed Success No-Knead Sourdough Bread + Make Your Own Sourdough Starter

Sourdough no knead bread

It’s a bold statement to guarantee you’ll succeed with something, however based on my own experience I am confident you will. I first started dabbling with no-knead breads a couple of years ago, and whilst it felt like fumbling in the dark my results have been – to my slight surprise – good from day 1. So I think, if you follow the steps accordingly, you will too. So if you fancy homemade sourdough bread next weekend – start this now!

Making your own sourdough starter

It is not hard. It takes some patience and diligence, remembering to feed it daily. But it is a far more easygoing pet than most (no fouling or needing to go outside, for example).

  1. Grab a suitable container – I would suggest an old cleaned out glass jar with a lid. I have never succeeded using plastic so would advise against this (sorry, tupperware).
  2. Start your sourdough culture.
    Day 1:
    Mix 100 ml wholemeal flour, 100 ml plain flour, 1 tbsp salt and 200 ml water in a clean glass container. Stir very well, then cover and leave on the kitchen counter .
  3. Days 2-4:
    Add 50 ml wholemeal flour, 50 ml plain flour and 100 ml water to the starter. Stir well and cover again.
  4. On day 4 you should be seeing bubbles in your starter, and you can move on to step 5. If not, discard and start over.
  5. Days 5-8:
    Morning and night, discard around half the dough and add 100 ml flour and 50 ml water. The timings don’t have to be exact – in my case I did it around 7am in the morning before going to work and again between 6pm and 9pm depending on my schedule that day.
    For example:
    Day 5:
    Morning, 7 am: discard half the dough. Add 100 ml flour and 50 ml water. Stir well and cover.
    Night, 7.30pm: discard half the dough, add 200 ml flour and 50 ml water. Stir well and cover.Repeat until dough doubles in size in 12 hours. I used a mix of plain and wholemeal spelt flour throughout and found the resulting starter to be flexible and accepting of various proportions plain/wholemeal, and perfect for the bread I give you the recipe to here.Keeping your starter alive:
    I keep mine in a glass jar in the fridge and make I refresh it once a week. Most weeks I will bake something; removing half or so and adding equal parts flour and water to the remains. If you don’t bake, simply discard half and add flour and water in equal parts.
  6. No-Knead Sourdough Bread
    Makes 1 loaf
    No-knead bread is super simple to make as long as you take your time. Start this bread the day or the night before you want to eat it. For Saturday morning that means starting Friday evening – you need between 12 and 18 hours for the first rise, depending on the temperature of your kitchen (In my 20 C kitchen I left it for approximately 14 hours).Recipe:
    Stir 60ml starter into 360 ml water. Whisk until it dissolves.In a glass or pyrex bowl:
    115g wholemeal flour
    340g plain flour
    1tsp saltStir together and pour wet into dry. Mix together with a spatula or stiff fingers (form a beak with your fingers) until a wet dough forms. Cover and let rest 12-18hrs on the counter.The next morning (or whenever you are baking!) flour your worktop and scoop the dough out. Flour your hands and pat the dough flat into a rectangular shape. Fold into three – like a letter – then the resulting rectangle into two so you end up with a ball-like shape. You may want to repeat this another time if your dough is very loose – it should keep its shape somewhat. If it doesn’t don’t worry – you might end up with a slightly flatter bread, but equally delicious!

    Prepare a cloth or a basket with a thick layer of coating – e.g. wheat bran or wholemeal flour. I used a wooden fruit bowl that I covered with a thin layer of oil to make the flour stick. Cover it very well – your dough will want to stick, don’t let it. Transfer your dough ball into basket or cloth; cover with a cloth and leave to rise for 1 hr. After 1 hr, turn the oven to 260 C and put your cast iron pot inside. I used an enamel pot similar to Le Creuset – use whatever cast iron you have on hand that has a lid. Leave to heat up for 30 minutes – you want your pot as hot as possible to get you that great crust!

    After 30 minutes, remove your pot carefully and sprinkle generously with wheat germ or flour on the inside (I didn’t the first time – the bread was NOT coming out….). Gently place your dough into the pot, cover with the lid and bake for 30 minutes.
    When timer beeps, turn the temperature down to 230 C and take the lid off for a final 15 minutes.

  7. Leave bread to cool for at least 1 hr before cutting into (this really is the hardest part!).Notes: If you are in a one-man household, like me, it’s good to know that the bread freezes very well. I slice mine up and freeze, defrosting and toasting only what I’ll eat on any given day.The bread will keep on the counter for 2 days, but the crust will soften slightly and go slightly chewy – as all sourdoughs do.Best enjoyed fresh with a thick layer of salted butter and perhaps some cheese. Great alongside soup – I have a great recipe coming soon.

Healthy, Hearty Granola Bars

easy granola bar nordicbaker

You know those chubby, chewy, sticky, sweet golden bars you see in the shop? Proclaiming themselves as healthy? You know the ones – bursting with oats, nuts and dried fruits but also laden with syrup, sugar, unhealthy fats and unnecessary additives.

This recipe is for granola bars, but a type that is actually good for you. Filled with oats, nuts, seeds and some dried fruits, they provide a filling snack, a part of a breakfast or perfect pick-me up before or after the gym. I have been making these for years, a true staple in my kitchen. Easy to make and easy to customise to your liking – sub fruits and nuts for your favourites – below is my suggestion.

Healthy, Hearty Granola Bars

makes 16-24, depending on size.
Oven: 180 Celsius

1+2/3 cups rolled oats (or quinoa flakes or a mix)
4 tbsp coconut sugar (normal works just fine)
1/3 cup oat flour (make your own by grinding oats in a food processor)
1/2 tsp ground cinnamon
2 cups dried fruits and chopped nuts (total of 300-400g)
– Almonds, walnuts, sesame seeds, dates and cranberries or raisins are my faves.

Optional: 1/2 cup nut butter
6 tbs melted butter (oil works too)
1 egg, whisked lightly
2 tbsp agave syrup (or golden, or maple or even honey!)
1 tbsp water

Line a small baking tray (20×30 cm, or similar) with baking paper, allowing it to go up the sides. This makes it a lot easier to get it out of the tin after baking.

Stor together the fry ingredients, including the fruit and nuts. In a separate bowl, whisk together melted butter, liquid sweetener, egg and water. Add nut butter if using (warm it up to make it easy to stir). When thoroughly mixed, add to dry ingredients and toss until the mixture is evenly crumbly and there are no dry parts.

Spread mixture in prepared pan, pressing firmly down to ensure they are moulded to the pan and that they will stay together after baking. A piece of plastic wrap or parchment paper can help – just press down with your hand on top.

Bake the bars for 30 to 40 minutes, until golden brown around the edges and on top. They’ll still seem soft and perhaps a little under baked when you press into the centre of the pan – but don’t worry, they will set completely as they cool.

Leave to cool in pan, then put them into the freezer before cutting – this ensures clean cuts. Cut with a serrated knife, and wrap individually in cling film or foil. Store in freezer – they thaw in minutes so you can easily grab one on your way out the door on busy mornings.

Keeps well for about one month.

The Best Chocolate Chip Cookies

Best chocolate chip cookies

Now I know there are as many opinions about what is the best chocolate chip cookie as there are chocolate chips out there. Many swear to the classic Nestle Toll House, others to shop bought Maryland cookies, and I for many years, swore to the version my mum makes. My mum’s chocolate chip cookies are still amongst my most frequent bakes- it’s a fool proof, infinitely adaptable basic chocolate cookie. Funnily, the first few times she made it, I never cared for it much. It was fine – but nothing to write home about. Then all of sudden, I loved them. The reason? She had been converted, by my food-tastic auntie, to butter. I grew up having butter on toast, but baking was normally done with margarine. The day my mum made those cookies with butter, was the turning point – margarine has never been bought again. The change in flavour, in texture and looks was amazing.

The cookies I am making here, are slightly different. They are the more mature older brother of my mum’s cookies. For once when baking, I followed a recipe to a T. And I would strongly recommend you do the same. At least the first time – then experiment if you want, the next time around. For me, these need no tinkering. They are chocolate chip cookie perfection – and no more fiddly than my mum’s. The recipe comes from a blog I have read for years – David Lebovitz’ – he’s a former pastry chef  turned cook book author and also food / travel writer. His blog is well worth a visit; his writing about his life in Paris and all his travels is amazing. And of course, there’s the occasional star recipe there too.

Adapted, only slightly, from David Lebovitz’ recipe. Original recipe found here.
I used vanilla paste instead of extract – you can also use vanilla sugar, just remove the same amount of white sugar if you do.
I always use salted butter in my recipes. If you use unsalted, add a pinch more salt. The salt really adds another dimension the chewy sweetness of these.

The Best Chocolate Chip Cookies

Set oven to 175 fan / 18o degrees C.

120g salted butter, soft (room temperature)
100g brown sugar
100g white sugar
1 large egg
1/2 tsp vanilla extract (I used paste)
180g flour
1/2 tsp baking soda
1/2 tsp flaky sea salt
200g chopped dark chocolate
1 cup chopped toasted nuts (optional) (I used around 75 g)

Place the butter and sugars in a bowl and mix with a hand mixer until smooth and creamy. Add egg and vanilla, mix well. In a separate bowl, mix together flour, salt and baking soda. Stir into the wet until just combined, then add chopped chocolate and nuts. Stir until combined and the chocolate and nuts are evenly distributed.

IF YOU CAN: I strongly recommend chilling the dough for at least 4 hours. The flavours meld together and develop into something different. I like to rest mine overnight – the dough is easy to whip up in the evening, then you can bake the next day.

They can also be baked straight – but rest it for around 10 minutes in the fridge stiffen the dough slightly. To bake, prepare your baking trays with parchment paper or silicone mats. Form balls around 2 cm diameter, and place evenly on the baking trays.

Bake for around 10 minutes (depending on your oven – keep an eye on the first tray). Rotate the tray halfway to ensure an even bake. When they look set, remove from oven and tap each cookie with a spatula. Sounds weird I know – but it really helps give you that chewy centre!
Return to oven and bake for about 2 minutes until golden brown around the edges.

Remove from oven and cool on a wire rack. Try not to eat all of them in one go.

The cookies keep for about 1 week in an airtight container in room temperature (although I doubt this will be a problem).

The dough also freezes beautifully for up to 2 months so you can make the full amount of dough and only bake the amount you need.

Best Banana Bread

Sunday, rain, bananas on the verge of mush. It can only mean one thing – banana bread.
A firm favourite of mine, easy and quick to make and reduces waste. Keeps beautifully and fills the house with a comforting, delicious smell. I’m always on the hunt for great recipes but not very good at sticking to them. The below is an adapted version of Smitten Kitchen’s Crackly Banana Bread (link) – a great blog I recommend to anyone looking for easy to make, delicious food.

Banana Walnut Bread

(notes: the flour can be swapped for regular white wheat flour, or a mix of whatever you have lying around. If you do not use coconut flour, increase amount to about 170 g in totals as coconut flour swells, meaning you need less of that compared to other flours.)

Set oven to (fan) 180 degrees celsius.

2-3 large very ripe bananas

2 small eggs

80 ml melted butter

3 tbsp honey 

75 g soft brown sugar

100 g wholegrain spelt flour

50 g coconut flour

1 tsp baking soda

1 tsp flaky sea salt

1.5 tsp cinnamon

1 tsp ground ginger

0.5 tsp ground cloves

85g chopped walnuts (optional)

30g chia seeds (optional – I had some lying around)

In a bowl, mash bananas with a fork or masher. Add eggs, sugar and honey, and mix well. Add melted butter, stir until combined. In a bowl, combine flour, salt, baking soda and spices. Chop walnuts. Add flour mix to the wet, and stir until just combined. Add walnuts, stir until evenly distributed. 

Butter a loaf pan, add mixture, and bake for 40-50 minutes until evenly baked – a skewer inserted in the middle should come out clean, and it should spring back at the touch. 

Let cool in pan on a rack. Enjoy with a smear of butter, drizzle of honey, nutella, peanut or almond butter, or whatever trickles your fancy. Or just as it is. Keeps well, and is amazing toasted, too. 

Marts